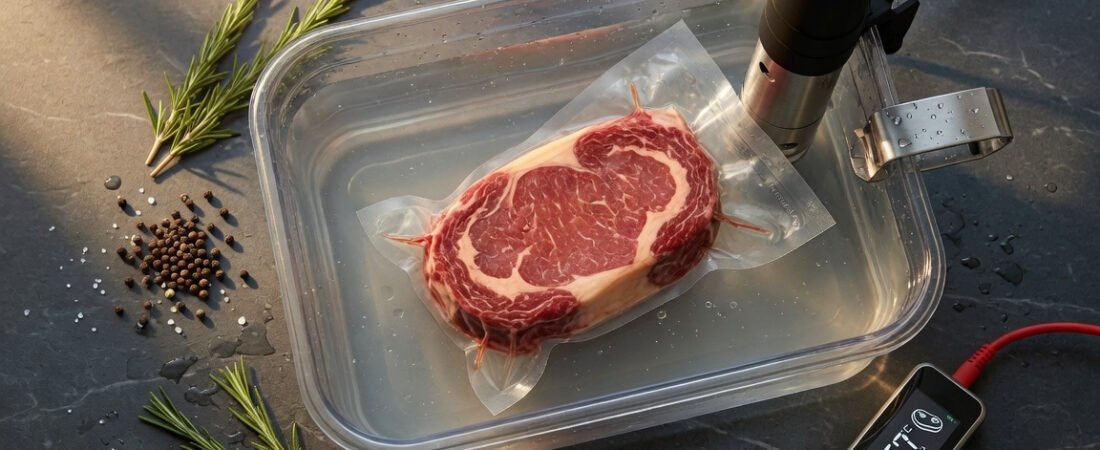
Sous vide is a cooking method where food is sealed in a bag and cooked in a precisely temperature-controlled water bath. The result is perfectly cooked food every single time — no guessing, no dry chicken, no overcooked steak. It’s the most reliable way to cook restaurant-quality meals at home, and it’s far easier to learn than most people expect.
Whether you’ve just heard the term for the first time or you’ve been experimenting for a while and want to go deeper, this guide covers everything — from the science that makes sous vide work, to the equipment you need, the temperatures that matter, food safety explained clearly, and the most common beginner mistakes to avoid from day one.
Quick Summary
- What it is: Food sealed in a bag and cooked in a water bath held at a precise temperature — usually between 50°C and 85°C (122–185°F) depending on what you’re cooking.
- Why it works: Temperature is held constant to within ±0.1°C, delivering uniform doneness throughout.
- What you need: An immersion circulator and a food-safe bag. Entry-level setups start around $50–$80 — less than a single restaurant dinner.
What Exactly Is Sous Vide Cooking?
The term “sous vide” comes from French and literally means “under vacuum.” At its core, the method involves three simple steps: place food in a sealed bag, submerge it in a water bath, and cook it at a precisely set temperature for a defined amount of time. That’s the whole thing. The technique sounds technical, but the concept is beautifully simple once you understand what makes it different from every other cooking method.
What sets sous vide apart is what the water bath doesn’t do — it doesn’t spike, it doesn’t fluctuate, and it doesn’t overcook your food. A pan on a hob can swing 20–30°C above your intended temperature in seconds. An oven has hot spots and uneven airflow. A sous vide bath holds to within a fraction of a degree, giving food nowhere to go except exactly where you set it. A steak cooked at 57°C / 135°F stays at 57°C, producing perfect, uniform medium-rare from edge to center — every time, not just when you’re lucky.
Sous vide has its roots in 1970s France. Chef Georges Pralus began using vacuum cooking at Restaurant Troisgros to improve the texture and reduce the shrinkage of foie gras. Around the same time, food scientist Bruno Goussault was independently developing the scientific principles behind safe, low-temperature cooking — particularly the relationship between time and temperature in pathogen reduction. Their work eventually converged and gave professional kitchens a method they would rely on quietly for the next three decades.
For a long time, the equipment was far too expensive and industrial for home use. That changed in the early 2010s when consumer immersion circulators — compact handheld devices that clip to the side of a pot — arrived on the market at prices ordinary home cooks could justify. Today, you can start cooking sous vide for under $80, and an entirely new generation of home cooks is discovering what professional kitchens have known for years.
Why Are Home Cooks Falling in Love with Sous Vide?
The short answer: it removes almost every way that cooking a protein can go wrong. With conventional methods, success depends on timing, intuition, equipment you can’t fully control, and an unbroken stretch of attention. A brief distraction — a phone call, a boiling pot, a guest at the door — can tip a perfectly good steak into overdone territory.
Sous vide doesn’t punish distraction. Once the water reaches your target temperature, your food cooks to that exact doneness and holds there safely. A chicken breast at 63°C won’t overcook if you leave it an extra 30 minutes. You’re working with a generous, forgiving window rather than a knife-edge. That single fact converts most people who try it. The anxiety of “is it done yet?” simply disappears.
Proteins cooked sous vide tend to be noticeably juicier and more tender, because the sealed environment prevents moisture loss to evaporation or radiant heat.
Flexibility is the other major draw. Sous vide fits modern, busy lives in a way few cooking methods do. You can start a beef short rib at 7am and serve it at 7pm without once hovering over it. Consistency and ease of use are the reasons most often cited by home cooks who recommend it to others — and given how gentle the learning curve is, that enthusiasm spreads quickly.
What Equipment Do You Actually Need?
Good news: the barrier to entry is genuinely low. You don’t need a professional kitchen, a dedicated appliance the size of a microwave, or an elaborate setup to get outstanding results from day one.
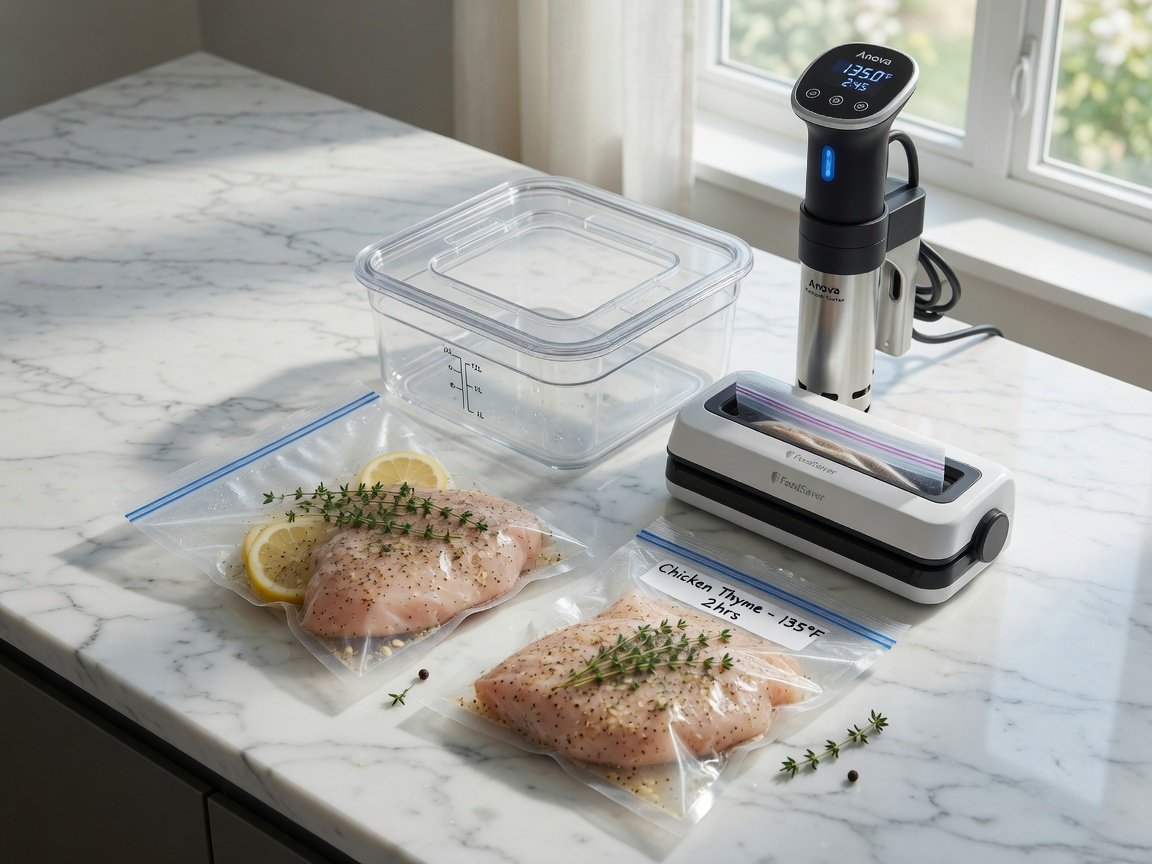
The two non-negotiables are an immersion circulator and a food-safe bag. An immersion circulator is a handheld device that clips to the side of a pot or container, heats the water to your target temperature, and circulates it to ensure even heat distribution throughout. A food-safe bag — either vacuum-sealed or a heavy-duty zip-lock bag — holds the food and prevents water from getting in during the cook.
- Entry level ($50–$80): Manual temperature setting, no app connectivity, clips to any pot. Perfectly capable for most home cooking needs and a great place to start.
- Mid-range ($100–$200): Wi-Fi or Bluetooth connectivity, app control, faster heating to temperature, quieter motor. The sweet spot for regular home use.
- Premium ($200+): Ultra-precise temperature control (±0.1°C), faster heat-up on large volumes, quieter operation, longer warranties. A meaningful upgrade for serious enthusiasts.
Beyond the circulator and bags, a few extras make life easier but aren’t required. A dedicated sous vide container — typically a 12-litre polycarbonate food-storage bin — gives you more capacity and better water circulation than a standard stockpot. A neoprene sleeve or container lid reduces evaporation during very long cooks. A vacuum sealer creates a tighter seal and speeds up batch cooking. And a cast iron skillet or culinary torch is essential for the post-cook sear that finishes the dish and creates the crust that sous vide alone can’t provide.
Popular brands in 2026 include Anova (whose Precision Cooker line effectively created the consumer sous vide market), Breville (which now incorporates the Joule line it acquired from ChefSteps), and several newer entrants offering strong performance at highly competitive prices. The market has matured significantly — buying from any reputable brand in any price tier will get you consistent, repeatable results from your very first cook.
How Does Temperature Control Make or Break Your Results?
Temperature is the single most important variable in sous vide cooking. Get it right and you get remarkable, consistent results. Get it wrong and you’ve wasted time and perfectly good ingredients — because precise temperature at the wrong number produces perfect mediocrity.
The core principle is straightforward: every food has an ideal internal temperature that corresponds to the texture and doneness you want. Sous vide lets you target that temperature with extraordinary accuracy — good circulators maintain temperature to within ±0.1°C. That level of precision matters because protein structures in meat begin to change at very specific temperatures, and differences of even 2–3°C produce meaningfully different results in the final dish. The difference between 54°C and 60°C steak is not subtle — it’s the difference between medium-rare and medium-well.
The fundamental advantage of sous vide over every other cooking method is absolute temperature control. When you cook something at 57°C, it reaches 57°C — and no more. The food cannot overcook by definition.
| Food | Target Temperature | Minimum Cook Time | What You Get |
|---|---|---|---|
| Steak (rare) | 49–54°C / 120–129°F | 1–2 hrs | Deep red centre, very tender, supple |
| Steak (medium-rare) | 54–57°C / 129–135°F | 1–4 hrs | Pink, juicy, uniform edge to edge |
| Steak (medium) | 60–63°C / 140–145°F | 1–4 hrs | Slightly pink, firmer texture |
| Chicken breast | 63–65°C / 145–149°F | 1–4 hrs | Moist, fully pasteurised, not rubbery |
| Salmon fillet | 50–52°C / 122–126°F | 30–45 min | Silky, slightly translucent, delicate |
| Pork chop | 60–63°C / 140–145°F | 1–4 hrs | Juicy, faintly pink, not dry |
| Eggs (soft-set) | 63°C / 145°F | 45–60 min | Custard-like white, runny yolk |
| Short ribs / tough cuts | 72–74°C / 162–165°F | 24–48 hrs | Collagen converted, fork-tender, rich |
| Root vegetables | 84–85°C / 183–185°F | 45–90 min | Tender, flavour-concentrated, vibrant |
Time works very differently in sous vide than it does in conventional cooking. More time doesn’t mean more doneness — it affects texture. A beef short rib cooked at 72°C for 24 hours will be meltingly tender as collagen converts to gelatin; the same cut at the same temperature for 8 hours will still be tough. Learning the time dimension — when to go long, when to stay short — is what separates a good sous vide cook from a great one.
Which Foods Benefit Most from Sous Vide?
Not every food needs sous vide — you’d never use it for a stir-fry, a risotto, or a loaf of bread. But for certain ingredients, the results are genuinely transformative. And once you’ve tasted sous vide chicken breast or a perfectly cooked piece of salmon, it’s very difficult to go back to conventional methods for those proteins.
The biggest beneficiaries are proteins that are easy to get wrong with traditional heat. Chicken breast is the canonical example. Notoriously prone to drying out in a pan or oven, chicken breast at 63–65°C sous vide comes out impossibly moist and properly pasteurised. Most people who try it can’t believe it’s the same cut they’ve been overcooking their whole lives. Salmon at 50–52°C achieves a silky, almost molten texture that high heat makes completely impossible to replicate, regardless of skill level.
Tough, collagen-rich cuts — short ribs, pork shoulder, lamb shanks, oxtail — respond beautifully to the long, low-temperature end of sous vide cooking. Extended cooks break down collagen into gelatin without drying the meat, producing a richness and tenderness that would require hours of attentive braising to approach conventionally. If you’re curious about just how wide the sous vide ingredient universe really is, exploring the full range of foods that respond to sous vide will open up a world of possibilities well beyond the obvious proteins.
Vegetables often surprise people most. Carrots cooked in salted butter at 84°C for 45–60 minutes develop an intensely concentrated sweetness that roasting can’t fully replicate — because roasting loses some flavour to evaporation, while sous vide keeps everything sealed inside. Beets, potatoes, asparagus, and artichokes all respond beautifully. For a first cook, though, stick to chicken breast or steak. The improvement over conventional methods is dramatic, immediately obvious, and deeply convincing.
How Do You Cook the Perfect Sous Vide Steak?
This is the cook that converts most people to sous vide permanently. The process has a few more steps than throwing a steak in a pan, but the results are in a completely different league — edge-to-edge medium-rare with a deep, golden-brown crust, repeatable without fail. Here’s the complete process, step by step.
-
1Season your steak
Pat the steak completely dry with paper towels on all sides. Season generously with flaky salt and freshly cracked black pepper. Add a sprig of thyme, rosemary, or a smashed garlic clove to the bag if you like — aromatics infuse beautifully during a long, sealed cook.
-
2Seal the bag
Place the steak in a heavy-duty zip-lock bag. Use the water displacement method: slowly lower the bag into the water with the zip just above the surface, letting water pressure push the air out from below, then seal. Or vacuum-seal it if you have a sealer — either works well.
-
3Set your circulator temperature
For medium-rare, set to 54–57°C / 129–135°F. The exact temperature is personal — 54°C gives a more muscular, deep-red result; 57°C is the classic medium-rare that most people love. Pick a number and commit to it so you learn your own preference.
-
4Cook
For a 1-inch steak: 1–2 hours. For 1.5–2 inches: 2–4 hours. You can leave it an extra hour without meaningful texture degradation in most cuts. Avoid going much beyond 4 hours for a standard steak — at that point, the texture can start to become a little softer than ideal.
-
5Remove and dry thoroughly
Take the steak out of the bag and pat it completely dry with paper towels — really dry. This step is non-negotiable. Any residual surface moisture will steam the steak in the pan rather than sear it, and you’ll lose the crust entirely.
-
6Sear hard and fast
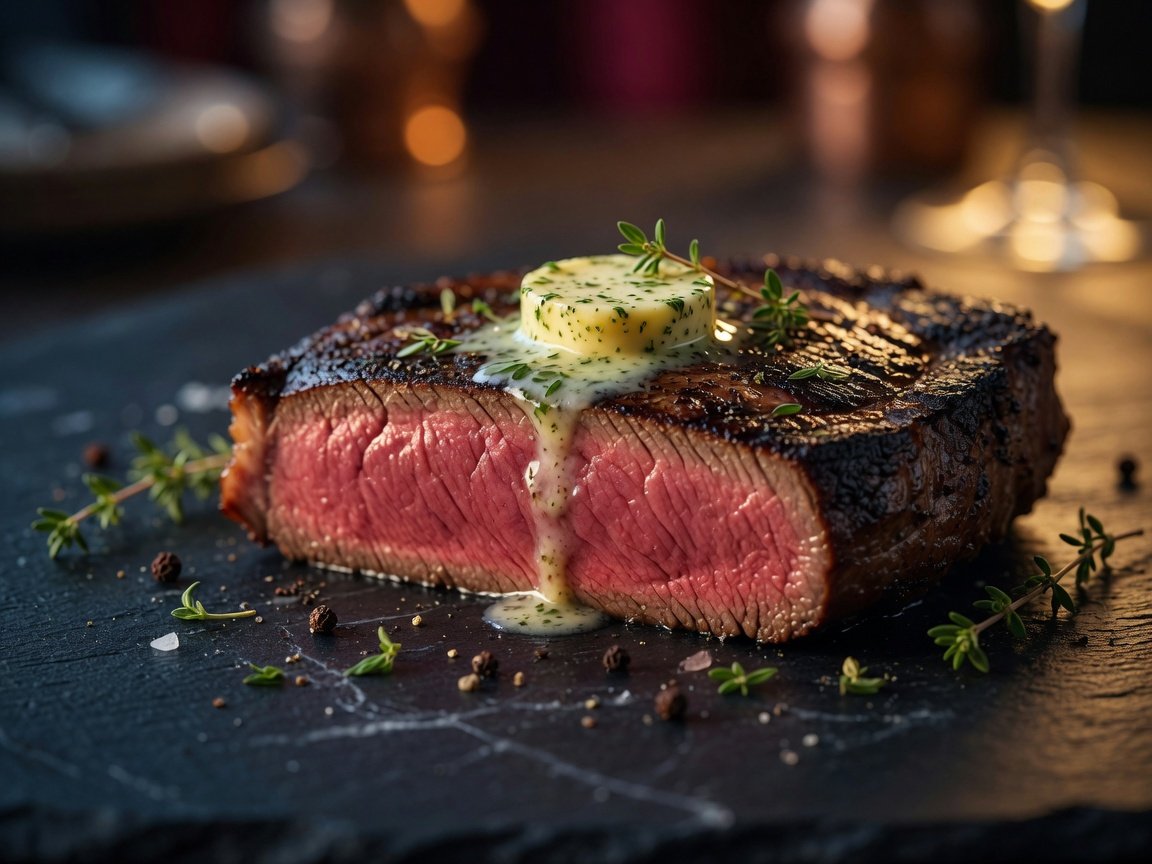
Get a cast iron skillet as hot as it will go — properly ripping hot. Add a high smoke-point oil (avocado or refined coconut work well). Sear 45–60 seconds per side. In the last 30 seconds, add a knob of butter and baste continuously. You’re building colour here, not cooking the inside — it’s already done.
-
7Rest briefly and serve
Two to three minutes is all you need — the internal temperature is already even throughout, so a long rest isn’t required. Slice against the grain and serve immediately. The cross-section will reveal uniform, perfect doneness from edge to edge.
Is Sous Vide Cooking Actually Safe?
Food safety is the question that trips up most new sous vide cooks — and it’s a completely fair concern. Cooking chicken at 63°C instead of the 74°C / 165°F most conventional guidance recommends sounds alarming until you understand the science behind it. Once you do, it makes complete sense.
The key concept is pasteurisation by time and temperature together. Food safety standards — including guidelines from the USDA and food safety agencies in the UK and EU — define safe cooking based on a combination of how hot and for how long. Bacteria are destroyed by high heat applied briefly, but also by lower heat applied for longer. The relationship is logarithmic: holding food at a given temperature for longer produces exponentially greater pathogen reduction.
The USDA’s own time-temperature tables show that chicken held at 63°C for one hour achieves the same 7-log reduction in Salmonella as chicken cooked instantaneously to 74°C. Both are equally safe — the 63°C version is simply far more pleasant to eat because the proteins haven’t been driven to the point of moisture loss and tough texture. Food scientists who specialise in low-temperature cooking have documented this consistently, and it is the scientific basis on which professional kitchens have operated for decades.
The other key safety consideration is temperature reaching the food’s core. Very thick cuts or frozen starting points require more time for heat to penetrate fully. Adding approximately 50% extra cooking time when starting from frozen, and using a food thermometer to verify core temperature on cuts thicker than 2 inches, closes any remaining gap. Properly practised sous vide is at least as safe as conventional cooking — and often more so, because the temperature holds precisely rather than fluctuating.
How Does Sous Vide Compare to Traditional Cooking Methods?
Sous vide is genuinely different from any conventional cooking method — not just incrementally better, but structurally different in how it delivers results. Understanding where it wins, where it doesn’t apply, and where traditional methods hold their own is what lets you use both intelligently.
| Factor | Sous Vide | Pan / Grill / Oven |
|---|---|---|
| Temperature precision | ±0.1°C — constant, maintained throughout | ±10–30°C — varies with equipment and technique |
| Moisture retention | High — food sealed, no evaporation | Lower — evaporation occurs, especially with high heat |
| Consistency across attempts | Very high — same result every time | Variable — skill- and attention-dependent |
| Skill ceiling | Low — set temperature and monitor | High — requires constant attention for proteins |
| Crust / sear quality | Excellent when seared post-bath | Excellent with direct high-heat method |
| Time flexibility | Very flexible — hold for extended periods | Requires precise timing or results suffer |
| Equipment cost to start | $50–$100 additional investment | Already owned by most households |
| Suitable for all foods | No — not for pizza, stir-fry, or baking | Yes — handles the full range of cooking tasks |
Precision cooking allows the cook to express an ingredient at its most honest. When you remove the variability from the cooking environment, what you’re left with is the ingredient itself — its natural flavour and its ideal texture, with nothing lost to overcooking or uneven heat.
The important nuance is that sous vide isn’t a replacement for all cooking methods — it’s a genuinely complementary one. Most experienced sous vide cooks use it alongside conventional techniques, choosing the right approach for each component of a dish. The sous vide bath handles the protein to perfect doneness; the pan or torch delivers the crust and the Maillard reaction that makes it complete. Used together, they produce results that neither method achieves alone.
What Mistakes Do Beginners Make (and How Do You Avoid Them)?
Most sous vide failures come down to a small number of very avoidable errors. Here’s what trips people up most often — and exactly how to sidestep each one.
Skipping the post-cook sear
Sous vide produces perfectly cooked food — but zero crust. The Maillard reaction that creates that deeply flavoured, textured brown exterior requires surface temperatures far beyond anything a sous vide bath reaches. Always finish with a sear. A screaming-hot cast iron pan, a culinary torch, or even a very hot grill applied immediately before serving is non-negotiable for most proteins. Without it, even a perfectly cooked steak will disappoint on texture and flavour depth.
Not drying the surface before searing
Surface moisture is the enemy of a good sear. The bag and cooking juices leave the food wet when it comes out. Any residual moisture will steam the food in the pan rather than sear it, turning what should be a 45-second crust-building process into a sad grey braise. Pat completely and thoroughly dry before the food touches the pan — this single step makes an enormous, visible difference.
Using the wrong target temperature
Cooking chicken at 74°C sous vide — the conventional “safe” temperature for quick-cook methods — produces chalky, dry breast. The entire point of sous vide is that you can go lower because the time compensates. Research your target temperatures before each cook. The table earlier in this guide is a reliable starting point. Precision applied to the wrong temperature is worse than no precision at all.
Using too small a container
The circulator needs space to move water efficiently. A small stockpot works for a single thin chicken breast, but for larger cuts or batch cooking, a 12-litre polycarbonate container gives better circulation, more stable temperature, and far more room to work. Small containers also lose heat faster and make the circulator work harder — a 12-litre bin with a lid is the single best upgrade a new sous vide cook can make.
Forgetting to season inside the bag
Salt should go in with the food before sealing. Seasoning only after cooking loses the entire opportunity for flavour to penetrate during the cook. A pinch of salt, cracked pepper, and whatever aromatics suit the dish go in the bag from the start. This is where sous vide’s sealed environment actually becomes an advantage — everything stays in contact with the food throughout.
Letting the bag float
Bags — especially those containing lighter foods or trapped air — can float to the surface, meaning part of the food isn’t properly submerged and isn’t cooking at the right temperature. A binder clip attaching the bag to the container edge, a sous vide rack, or even a heavy kitchen utensil laid on top solves the problem immediately.
Understanding why a technique works — not just following steps blindly — is what separates a cook who gets consistent results from one who occasionally gets lucky. In sous vide, small decisions compound. The right temperature, the right time, the right sear. Each one matters more than people expect.
How Are Professional Restaurants Using Sous Vide in 2026?
Sous vide has been a professional kitchen staple for decades, but its role has evolved considerably. In 2026, it’s no longer just a fine-dining showpiece — it’s operational infrastructure for kitchens at virtually every level of the market, from Michelin-starred tasting menus to mid-market restaurant groups serving hundreds of covers a night.
Sous vide is now a standard part of the prep and service workflow in upscale and fine dining restaurants across Europe and North America. The technique excels in professional settings because it enables batch cooking at scale, consistent replication across hundreds of covers per service, and the ability to hold proteins safely at serving temperature without any degradation in quality.
The gap between professional and home sous vide has narrowed dramatically. The equipment is essentially the same; only the scale differs. If you want to bring the same level of intentionality to your own kitchen that professional chefs apply to their service, the principles behind mastering sous vide at a higher level are genuinely within reach for any motivated home cook — not just culinary professionals.
What’s Next for Sous Vide? Trends to Watch in 2026–2027
The sous vide market continues to evolve quickly, driven by smarter hardware, broader food safety awareness, and a rapidly growing base of home cooks who’ve discovered the technique through video content and want to replicate restaurant results in their own kitchens.
- AI-guided cooking assistance: Several circulator manufacturers are embedding AI-assisted guidance into their companion apps for 2026. These systems dynamically adjust time and temperature recommendations based on cut type, weight, and desired doneness — removing the last remaining guesswork from the process for new cooks.
- Smaller, more storage-friendly form factors: The latest generation of circulators is significantly more compact than models from five years ago. Some 2026 models are barely larger than a kitchen thermometer, making storage far less of a practical barrier for space-constrained kitchens and urban apartments.
- Formalised food safety recognition: Food safety agencies in several countries are reviewing and updating their published guidance to formally recognise time-temperature pasteurisation tables for low-temperature cooking, making the scientific basis of sous vide more accessible and less confusing for the general public.
- Growth in plant-based and vegetable applications: As more home cooks adopt plant-forward eating patterns, sous vide is finding compelling new applications in vegetables, legumes, and tofu — where precise temperature control creates textures that high-heat methods simply cannot replicate.
- Continued market expansion: The home sous vide segment continues to grow, driven by younger cooks who encounter the technique through social media and cooking content and want to replicate the results for themselves.
The broader trajectory is clear: sous vide is moving from an enthusiast technique to a standard part of the home cook’s toolkit, in the same way that stand mixers and food processors became normalised in earlier decades. If you haven’t started yet, 2026 is the year to begin — the equipment has never been more capable, more affordable, or easier to use.
Frequently Asked Questions About Sous Vide
Do I need a vacuum sealer for sous vide?
No. A heavy-duty zip-lock bag and the water displacement method — slowly lowering the bag into water until pressure pushes air out, then sealing — works perfectly well for most applications. A vacuum sealer creates a tighter seal and is useful for batch cooking or very long cooks, but it’s a convenience upgrade, not a requirement. Many experienced sous vide cooks never bother with one.
Can I sous vide frozen food?
Yes. Add approximately 50% more cooking time to ensure the food reaches the target temperature at its core. This is actually a very practical approach — season and bag proteins before freezing them, then cook straight from the freezer when you need them. It saves prep time mid-week without any compromise in result.
How long can food stay in the sous vide bath?
For steaks and chicken breasts, you can safely leave them 1–4 hours beyond the minimum without noticeable texture problems. For tough cuts requiring long cooks (12–72 hours), the extended time is intentional and produces remarkable, transformative results. Avoid leaving delicate foods like fish or eggs significantly beyond their minimum times — texture will deteriorate and become mushy rather than improve.
What temperature should I use for chicken?
63–65°C (145–149°F) for 1–4 hours is the sweet spot that food scientists and experienced sous vide cooks consistently recommend. At this temperature, the chicken is fully pasteurised and safe, but remains moist and juicy rather than dry and rubbery. It’s frequently the preparation that converts sous vide sceptics — the texture is so different from what most people expect of chicken breast.
Does sous vide add any flavour to food?
Sous vide itself is neutral — it doesn’t add or subtract flavour. What it does is preserve the food’s natural flavours, because nothing escapes into the air during cooking. Seasonings and aromatics placed in the bag infuse directly into the food throughout the cook, often producing more pronounced flavour than surface seasoning applied only after cooking.
Can I sous vide vegetables?
Absolutely — and the results often surprise people who’ve only ever used sous vide for proteins. Root vegetables like carrots, potatoes, and beets cook beautifully at 84–85°C for 45–90 minutes, developing deeply concentrated sweetness and a texture that roasting can’t match. Asparagus and green beans work at around 85°C for 15–20 minutes. Add butter and a pinch of salt to the bag for best results.
Can I reuse sous vide bags?
Bags that held raw meat or fish should always be discarded after use. Bags that contained only vegetables or pre-cooked food can be rinsed thoroughly and reused. Many sous vide cooks prefer silicone reusable bags for vegetable preparations, reserving single-use bags for raw proteins — a practical approach that reduces waste without any safety compromise.
What’s the difference between sous vide and a slow cooker?
Both use low heat over a longer time, but the comparison ends there. A slow cooker has very limited temperature control — its high and low settings correspond to broad, imprecise temperature ranges rather than specific degrees. Sous vide controls temperature to within a fraction of a degree. A slow cooker also exposes food to a wet, open environment; sous vide seals food in a bag, retaining all juices and enabling precise seasoning. The quality of results is genuinely not comparable.
Your Next Steps: Starting Your Sous Vide Journey Today
Sous vide is one of those rare cooking techniques that genuinely delivers on its promise every single time. The learning curve is gentle, the equipment is affordable, and the results speak for themselves from the very first cook. There is no other method that so reliably produces restaurant-quality proteins at home with so little room for error — and so little active effort once the bath is running.
Here’s a practical sequence to follow over your first three months. Each stage builds on the last, and by the time you reach month three, you’ll have a reliable, repeatable toolkit that will permanently change how you cook proteins.
| Timeline | Goal | What to Cook |
|---|---|---|
| Week 1 | Get set up and cook your first sous vide protein | Chicken breast at 63°C for 1.5 hours — the texture will surprise you |
| Week 2 | Tackle steak and practise your sear | Ribeye or sirloin at 54–57°C for 1.5–2 hours, finished in a ripping-hot cast iron pan |
| Week 3 | Explore eggs and fish | Sous vide egg at 63°C for 45 minutes; salmon at 50°C for 35 minutes |
| Month 2 | Graduate to a long cook | Beef short ribs at 72°C for 24–36 hours — a genuine revelation in texture |
| Month 3 | Branch into vegetables and develop your own preferences | Buttered carrots at 84°C; experiment with different aromatics and seasonings in the bag |
By the end of three months, you’ll have a reliable, repeatable toolkit for proteins and vegetables that’s genuinely superior to conventional methods for most applications. The confidence that comes from knowing exactly what you’ll get when you open that bag — every single time — is hard to overstate once you’ve experienced it.
And when you serve a perfect edge-to-edge medium-rare steak, or an impossibly moist chicken breast, to someone who’s only ever had the conventionally cooked version — the reaction is always the same: “How did you do that?” Now you know.