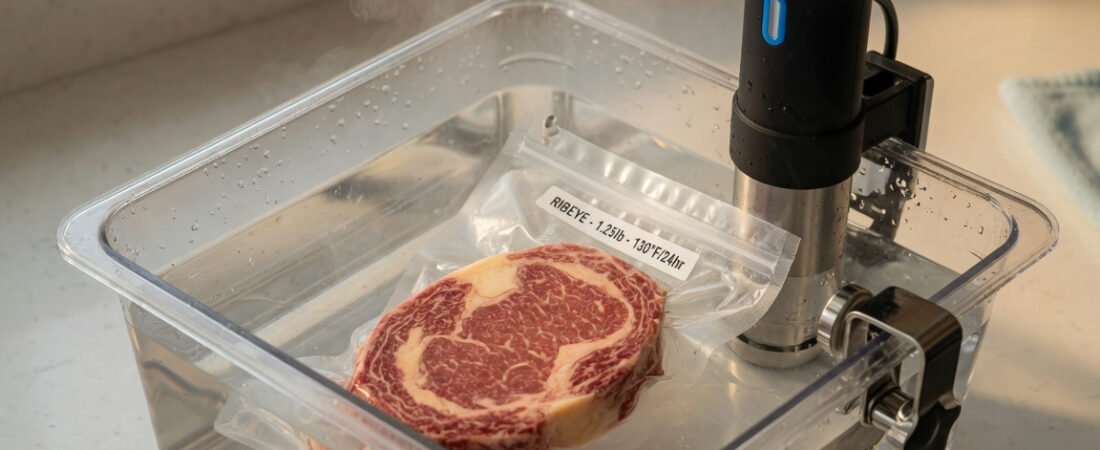
The sous vide method delivers perfectly cooked food every single time — no guesswork, no overcooked disasters. You seal your food in a bag, submerge it in water held at a precise target temperature, and walk away. That’s the whole system.
Key Takeaways
- Precision over guesswork: Sous vide holds water at the exact temperature of your target doneness — food physically cannot exceed it.
- Low barrier to entry: An immersion circulator ($70–$150), a deep pot, and heavy-duty zip-lock bags are all you need to start.
- Repeatable, restaurant-quality results: Once you’ve dialled in your temperature, every single cook produces the same outcome.
- Food safety is built in: Sous vide pasteurises through a combination of temperature and time — the same science professional kitchens have relied on for decades.
What Is the Sous Vide Method?
Sous vide (pronounced “soo-veed”) is French for “under vacuum.” The technique seals food in a bag — with as much air removed as possible — and submerges it in water maintained at a precise, constant temperature. That temperature corresponds directly to the finished doneness of the food, not a degree above it.
The method was developed in France during the 1970s by chef Georges Pralus and food scientist Bruno Goussault. Pralus first used it to keep foie gras perfectly intact during cooking. Goussault built the rigorous food-science framework around low-temperature cooking and spent decades documenting the pasteurisation data that professional chefs still rely on today. Together, they created a technique that transformed fine dining.
For roughly 40 years, sous vide stayed firmly inside high-end restaurant kitchens. Thomas Keller at The French Laundry in Napa Valley has long championed it as one of the most important tools available for consistent, repeatable cooking. Heston Blumenthal at The Fat Duck and the Modernist Cuisine team led by Nathan Myhrvold documented in exhaustive detail why the method achieves outcomes that conventional cooking genuinely cannot match.
Affordable home circulators changed the picture entirely. By the mid-2010s, quality units dropped well below $200. Today, a capable immersion circulator is available for under $100, and sous vide has moved firmly into home kitchens. Search interest for the technique has grown consistently year over year since 2015 and now sits among the most-searched cooking methods among food enthusiasts globally.
The core principle is elegantly simple. Traditional oven cooking constantly risks overshooting your target — a steak in a 400°F oven shoots past 130°F the moment you’re distracted. Sous vide sets the water to exactly 130°F, and the steak cannot exceed that temperature no matter how long it stays in the bath. That ceiling is the whole game.
If you want a fuller sense of how this technique fits into the broader story of modern cooking, this deep dive into the world of sous vide cooking covers the method’s evolution across both restaurant and home kitchens beautifully.
How Does Sous Vide Actually Work?
An immersion circulator — a stick-shaped device that clamps to the side of a pot or container — heats the water and keeps it moving continuously. That constant circulation maintains temperature stability within approximately 0.1°C, which is far more precise than any household oven. Most domestic ovens swing 25°F or more from their set temperature at any given moment.
Water transfers heat roughly 23 times more efficiently than air. This is why a 130°F sous vide bath cooks food thoroughly even though 130°F air in an oven would barely warm anything. Heat penetrates the food evenly from all sides simultaneously — no hot edges, no cold centres, no temperature gradient from an overcooked crust to an undercooked middle.
The sealed bag does something else that’s easy to overlook: it traps everything inside. Juices, rendered fat, and added aromatics that would ordinarily evaporate or drip away stay in the bag, continuously basting the food throughout the entire cook. Research into low-temperature protein cooking consistently finds that sous vide preparations retain significantly more moisture than conventionally cooked equivalents, simply because there’s nowhere for that moisture to go.
At the molecular level, lower cooking temperatures also treat proteins more gently. High heat denatures muscle proteins aggressively, squeezing out moisture and tightening fibres. Sous vide’s lower temperatures break down collagen and connective tissue gradually without contracting muscle fibres as severely. The result — especially noticeable in chicken breast and lean beef — is a texture that reads as softer, more succulent, and fundamentally different from anything achieved at conventional cooking temperatures.
Why Are Home Cooks Switching to Sous Vide?
The practical benefits stack up fast. Convenience is the headline. Because sous vide is forgiving on timing — a steak meant to cook for one hour is still perfect at 90 minutes — you can set it up, step away, and come back when you’re ready. No hovering over a pan, no smoke alarms, no frantic last-minute timing between multiple dishes.
Consistency is the second major draw. Once you’ve found the time and temperature that produces your perfect steak, every future steak comes out identically. This repeatability is precisely why professional kitchens adopted the method long before home cooks did. Restaurants serving 200 covers a night cannot afford results that vary based on who is on the line or how attentive they’re being on a Wednesday evening.
Food waste drops meaningfully too. Proteins accidentally overcooked in a conventional pan often need to be discarded or repurposed into something else. Sous vide proteins essentially cannot overcook within their safe holding windows. A chicken breast sitting in a 145°F bath for two hours remains at exactly 145°F throughout — safe, moist, and ready whenever you need it.
Entertaining also changes character entirely. Your main course can be 90% complete hours before guests arrive. A two-minute sear just before serving — butter, garlic, fresh thyme in a screaming-hot cast-iron pan — and the food is on the table. The stress of timing multiple dishes simultaneously largely disappears, which is reason enough for a lot of home cooks to make the switch.
What Equipment Do You Need for Sous Vide?
The barrier to entry is genuinely lower than most people expect. Three items cover everything you need to start cooking:
- An immersion circulator. This is the device that heats and circulates the water. Entry-level models from reputable cooking brands run between $70 and $150 and perform just as well for home cooking as units costing two or three times more. App connectivity and faster heat-up times are the main differentiators at higher price points — actual cooking results are essentially identical across the range.
- A container. Your circulator clips onto almost any pot you already own. A 12-quart polycarbonate food storage container is popular because it’s tall, clear, and heat-safe. A large stockpot works just as well. For long cooks of 12 hours or more, a lid or a single layer of small balls floating on the surface reduces evaporation noticeably.
- Bags. Heavy-duty zip-lock freezer bags handle the vast majority of sous vide tasks without issue. Vacuum-sealer bags offer a tighter seal for cooks over 24 hours or for acidic ingredients, but you don’t need a vacuum sealer to get started. The water displacement method — slowly submerging a partially open zip-lock bag — removes virtually all the air automatically as the water pressure does the work.
Optional additions worth considering as you grow into the technique: a dedicated vacuum sealer for tighter seals and longer refrigerator storage, a cast-iron skillet or kitchen torch for the finishing sear, and a sous vide container lid to cut down on evaporation during overnight cooks. None of these are needed on day one.
What Foods Work Best with the Sous Vide Method?
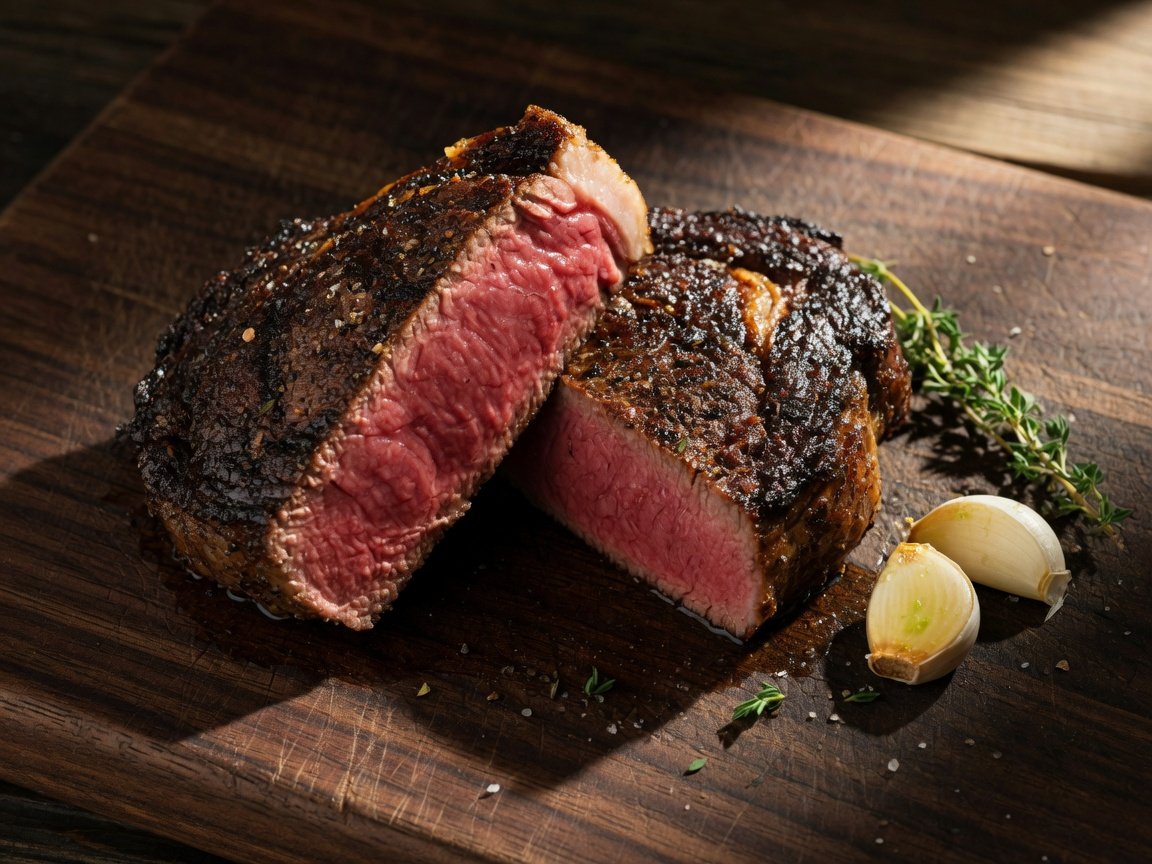
Proteins respond to sous vide more dramatically than any other food category. Steak is where most people start, and for good reason — cooking a thick ribeye to an edge-to-edge medium-rare and finishing it with a deep mahogany crust is the technique’s most celebrated and instantly persuasive demonstration. But the method works just as impressively across a wider range of proteins than most people initially realise.
Chicken breast — notoriously easy to dry out — becomes reliably juicy and tender at 145°F for one hour. Pork tenderloin at 140°F for two hours stays faintly pink and succulent in a way that conventional roasting simply cannot reproduce without anxiety about food safety. Duck breast at 135°F for two hours lands somewhere between a restaurant-style pan sear and a classic confit — a genuinely distinctive result.
Fish works beautifully at low temperatures. Salmon at 122°F for 30 to 45 minutes produces a silky, almost translucent texture that converts most first-timers immediately. Cod at 130°F for 30 minutes flakes cleanly and holds all its delicate moisture. Halibut and sea bass follow the same principle — the precision makes it nearly impossible to produce the dried-out, overcooked fish that puts so many people off cooking seafood at home.
Eggs deserve their own moment. The narrow window between a properly set white and a perfectly jammy yolk — nearly impossible to hit consistently by boiling — opens up entirely with temperature control. An egg cooked at 167°F for exactly 13 minutes produces the same soft-boiled result every single time. Custards and crème brûlée are natural fits for the same reason: precise temperature control eliminates the risk of scrambling the eggs in the cream.
Vegetables work differently but reward the method. Carrots at 183°F for one hour retain vivid colour and a concentrated, sweet flavour while becoming just tender throughout. Corn on the cob at 183°F for 30 minutes with butter sealed in the bag is one of those results that converts sceptics. The method even shines with beets, asparagus, and new potatoes — each benefiting from the controlled heat and sealed-in flavour.
What Are the Right Sous Vide Temperatures?
Temperature is the heart of the sous vide method. Unlike conventional recipes where the oven temperature is always far above the finished internal temperature of the food, sous vide temperatures correspond directly to the final doneness you want. Set the bath to 130°F and your steak will reach 130°F — no more, ever.
| Food | Temperature | Result |
|---|---|---|
| Steak (rare) | 120–125°F / 49–52°C | Deep red centre, very tender |
| Steak (medium-rare) | 129–134°F / 54–57°C | Red-pink, juicy, classic |
| Steak (medium) | 135–144°F / 57–62°C | Pink centre, slightly firmer |
| Chicken breast | 140–145°F / 60–63°C | Safe, moist, no pink |
| Pork tenderloin | 140°F / 60°C | Slightly pink, very juicy |
| Salmon | 120–130°F / 49–54°C | Silky to gently flaking |
| Soft-boiled egg | 167°F / 75°C | Set white, jammy yolk |
| Carrots | 183–185°F / 84–85°C | Tender throughout, vivid colour |
A few degrees in either direction produces a noticeably different result, which is precisely why precision matters so much. The USDA publishes minimum safe internal temperature guidelines for food safety, and sous vide respects these through a combination of temperature and holding time. Even lower-temperature cooks pasteurise food safely when the food remains at that temperature for the appropriate duration — a time-temperature relationship that food scientists have documented thoroughly and that professional kitchens worldwide rely on.
How Long Does Sous Vide Cooking Take?
Sous vide cooking time has two bookends: a minimum (how long until the food is fully heated through and safe) and a maximum (how long before the texture begins to degrade). Unlike conventional cooking where a few extra minutes can ruin a steak, sous vide gives you a comfortable window between those two points — and that window is one of the technique’s most practical everyday advantages.
A 1-inch steak typically reaches full temperature throughout in about one hour. You can leave it in the bath for up to four hours with no meaningful change in texture. Beyond four hours, extended protein denaturing gradually begins to soften the texture past the point most people prefer. The food is still safe — it’s the mouthfeel that shifts.
Tough, collagen-rich cuts tell a different story, and this is where sous vide’s second superpower becomes apparent. A beef chuck roast cooked at 135°F for 48 hours comes out as tender as a traditionally braised pot roast, but with the uniform doneness of a grilled steak. The very long, very low-temperature cook breaks down collagen into gelatin without simultaneously overcooking the muscle fibres — a result that braising at higher temperatures simply cannot achieve.
Practical time windows for the foods home cooks use most:
- Steak (1 inch): 1–4 hours
- Chicken breast: 1–4 hours
- Pork tenderloin: 1–4 hours
- Fish fillet: 30–45 minutes
- Soft-boiled egg: 13 minutes
- Chuck roast (braised-style tender): 24–48 hours
- Carrots: 1–2 hours
These windows are quietly transformative for real-life cooking. “Dinner needs to be on the table at 7pm exactly” becomes “dinner can be ready anytime between 6pm and 9pm.” For anyone managing a household, kids, or guests, that kind of built-in flexibility is worth a lot on its own.
Is Sous Vide Safe? What You Need to Know About Food Safety
Food safety is the question new sous vide cooks ask most often, and it is absolutely a fair one. Cooking chicken at 145°F feels instinctively wrong to anyone raised on the 165°F number they grew up seeing on food packaging. The key is understanding that food safety isn’t a single threshold — it’s about pasteurisation, which is a function of both temperature and time working together.
The USDA’s high-temperature recommendations assume near-instantaneous pasteurisation: hit 165°F and you’re done in seconds. But food science has established clearly that the same bacterial kill rate can be achieved at lower temperatures when the food remains at that temperature long enough. Chicken held at 145°F for at least 9 minutes achieves the same level of bacterial reduction as chicken briefly exposed to 165°F. This relationship is documented in USDA-published time-temperature tables and is the operational basis for commercial food processors and professional restaurant kitchens worldwide.
Bruno Goussault — the food scientist who co-developed the sous vide method and spent decades studying the safety of low-temperature cooking — contributed foundational research to this area. His work, along with the comprehensive documentation in Modernist Cuisine (2011) by Nathan Myhrvold and team, made the sous vide safety framework accessible to professional and home cooks alike. This isn’t fringe food science: it’s the established consensus.
Practical safety rules to follow at home:
- Keep bags fully submerged throughout the entire cook — any food exposed above the waterline is not being pasteurised
- Do not cook below 130°F for more than four hours — bacterial growth accelerates in the temperature danger zone between 40°F and 130°F
- Chill food immediately if not serving right away — 30 minutes in an ice water bath, then into the refrigerator; safely stored bags can be reheated in the bath before serving, lasting up to a week
- Use fresh, high-quality ingredients — precision temperature control does not reverse the effects of food that was already deteriorating before it went in the bag
Followed correctly, sous vide is one of the safest cooking methods available to home cooks. The precision actually makes it more reliable than stovetop cooking, where internal temperature fluctuates constantly depending on pan calibration and cook attention.
What’s the Finishing Step and Why Does It Matter?
Sous vide cooks the interior of food to perfection. It does nothing for the outside — and that’s by design. The finishing step is where you add the crust, the colour, and the aromatic complexity that make food visually appealing and deeply flavourful.
A steak straight from the sous vide bath is cooked perfectly inside but grey and unappetising on the surface. Getting the exterior right means triggering the Maillard reaction — the high-heat chemical process that browns proteins and sugars simultaneously, creating hundreds of flavour compounds and the colour, aroma, and crunch that define a great sear. The Maillard reaction requires surface temperatures well above 300°F, which a 130°F water bath will never provide.
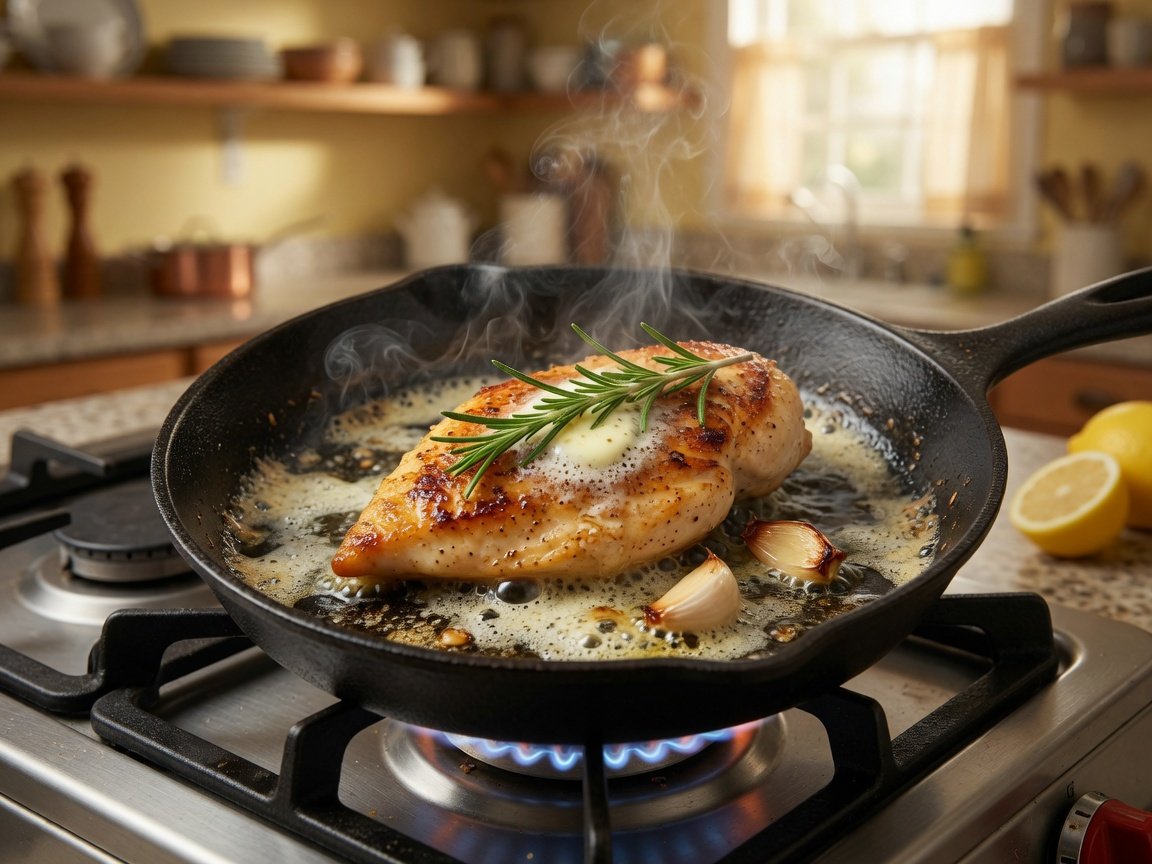
The sear is typically done in a cast-iron skillet on the highest heat your burner can produce, for 45 to 90 seconds per side, with butter, garlic, and fresh herbs basting the surface throughout. A kitchen torch works well for fish and irregular cuts. Some cooks prefer a quick pass over very hot grill grates for a smoke element that the skillet can’t replicate.
Because the interior is already at your target temperature, speed is everything during the sear. Two rules make the difference: pat the surface completely dry before the pan (moisture creates steam, and steam blocks browning), and don’t move the food for the first 45 seconds (contact with the hot surface is what creates the crust). Maximum exterior browning with minimal heat penetration into the already-perfect interior is the goal — and with practice, it takes less than two minutes total.
What Are the Most Common Sous Vide Mistakes?
Even a forgiving technique has failure modes. These are the ones most likely to trip up beginners — and every fix is simple once you know what to look for.
- Not drying the surface before searing. Moisture on the food’s surface creates steam when it hits the hot pan, suppressing browning and producing a grey, steamed exterior instead of a crust. Pat the food dry with paper towels immediately after removing it from the bag — this single step makes a dramatic difference.
- Over-doing the aromatics. Aromatics amplify strongly in a sealed, heated environment. A single garlic clove in a sous vide bag can deliver the flavour impact of three or four cloves in an open pan. Start with significantly less than you think you need and adjust on the next cook.
- Overcrowding bags in the container. Food needs water circulating freely around all surfaces to cook at a consistent temperature. Bags that overlap or cluster together create pockets where water doesn’t flow properly. Arrange bags vertically using clips, binder clips, or sous vide weights to keep them separated.
- Skipping the ice bath when not serving immediately. Food that isn’t going straight to the table needs to drop below 40°F quickly — not gradually in the refrigerator. Thirty to sixty minutes in an ice water bath before refrigerating is the correct procedure, and it makes the food safe to reheat up to a week later.
- Not adjusting time for frozen food. One of sous vide’s genuine conveniences is that frozen food can go directly into the bath without thawing. But you need to add roughly 50% to the standard cook time to account for the thawing phase at the start of the cook.
How Does Sous Vide Compare to Traditional Cooking Methods?
Sous vide wins on precision, consistency, and forgiveness. It trades speed and spontaneity to get there. Understanding where it sits alongside conventional methods helps you choose the right tool for each situation rather than treating it as a replacement for everything else in the kitchen.
Versus pan searing: Pan searing is dramatically faster — a thin steak is done in six minutes. But the seared steak has a temperature gradient, overcooked near the surface and at target temperature only in the centre. Sous vide produces the target temperature edge to edge with no gradient at all. The smartest approach combines both: sous vide the interior, pan sear the exterior for the crust. You get precision and flavour.
Versus oven roasting: Household ovens typically vary by 25°F or more from their set temperature and circulate dry air that dehydrates food surfaces. Sous vide eliminates both variables. Oven roasting has advantages for whole birds and large bone-in roasts where skin-on browning matters throughout the cook — sous vide is better for boneless portions where uniform interior doneness is the priority.
Versus braising: Both produce tender results in tough, collagen-rich cuts. Braising creates a shredding, falling-apart texture with a rich, reduced sauce. Long sous vide cooks produce similar tenderness but with the cut holding its shape — sliceable rather than shreddable — and a cleaner, more focused flavour not muddled by the braising liquid.
Versus grilling: Grilling creates a smoky char that sous vide cannot replicate on its own. Combining the two — sous vide first to the target temperature, then a brief pass over very hot grates — gives you precise interior doneness and exterior char simultaneously. Competition barbecue cooks increasingly use this hybrid approach for brisket, short ribs, and pulled pork.
Sous vide isn’t a replacement for every other cooking method. It’s a precision tool that makes certain outcomes — uniform doneness, consistent results, stress-free timing — achievable in ways nothing else can match. For anyone ready to go further into technique and flavour combinations, this comprehensive look at mastering the art of sous vide cooking covers advanced timing, temperature pairings, and finishing strategies in much greater depth.
Frequently Asked Questions
Do I need a vacuum sealer to cook sous vide?
No — and this surprises a lot of people. Heavy-duty zip-lock freezer bags work perfectly well for the vast majority of sous vide cooks. The water displacement method handles the air removal: seal the bag almost completely, then slowly lower it into the water while leaving the zip partially open. The water pressure pushes out virtually all the air before you seal it fully. Vacuum sealers are worth adding to your kit for cooks lasting over 24 hours, for acidic ingredients that can weaken zip-lock seals over time, or if you want to batch-cook and refrigerate portions for use throughout the week. They’re a nice upgrade, not a requirement.
Can you overcook food in a sous vide bath?
Not in the conventional sense. Food in a sous vide bath cannot exceed the water temperature — a steak in a 130°F bath will never cook above 130°F, no matter how long it sits there. That said, leaving food significantly beyond its maximum recommended window does affect texture. Proteins continue to denature over very long periods, gradually producing a softer, more uniform texture that crosses from pleasantly tender into mushy for some cuts. Staying within the recommended timing window — generally up to four hours for most proteins — keeps results in the optimal range. Beyond that, results vary by cut.
Why does sous vide food need to be seared after cooking?
The sous vide bath cooks the interior to your target temperature with precision, but it can’t create the Maillard reaction — the high-heat chemical process that browns the outside of food and creates the crust, caramelised flavour, and aroma that make a steak taste like a great steak. Without a finishing sear, the food is cooked correctly inside but grey and visually unappetising on the surface. A cast-iron pan on high heat for 45 to 90 seconds per side (or a kitchen torch for smaller items) provides all the browning you need without meaningfully pushing the already-precise interior past its target temperature.
Is it safe to cook steak at 130°F sous vide?
Yes, absolutely — when you hold it at that temperature for the appropriate length of time. Food safety is a function of both temperature and time, not temperature alone. A steak held at 130°F for at least 30 minutes achieves the same bacterial reduction as instantaneous exposure to higher temperatures, following time-temperature pasteurisation relationships documented by the USDA and applied in professional food processing and restaurant kitchens. The same principle applies to chicken at 145°F held for 9 minutes. Lower temperature plus sufficient time equals the same safety outcome. This is established food science, not a workaround.
What’s the difference between sous vide and slow cooking?
They feel similar — both involve extended cooking — but they work very differently and produce distinct results. A slow cooker typically operates between 170°F and 280°F on its low and high settings. These temperatures exceed the target internal temperature of most proteins, which means slow-cooked food overshoots its ideal doneness. That’s exactly why slow-cooked meat shreds so easily — it’s been well past the target for hours. Sous vide holds food precisely at the target temperature, which means a chuck roast can be simultaneously fork-tender (from the long time breaking down collagen) and medium-rare (because the temperature never exceeded 135°F) — a result that’s physically impossible to achieve in a slow cooker.
Can sous vide bags leach harmful chemicals into food?
Not when you use food-safe bags, which is the short and reassuring answer. Standard zip-lock freezer bags and purpose-made vacuum-sealer bags are manufactured from food-grade polyethylene, a material that is chemically stable at sous vide cooking temperatures. The concern typically arises from research about BPA or phthalates in lower-grade plastics — food-grade polyethylene does not contain these compounds. The one type to avoid is thin sandwich or storage bags, which are not rated for heat. Quality freezer bags from major brands, and purpose-built sous vide bags from cooking equipment manufacturers, are safe for use at standard sous vide temperatures.
Your Next Steps: A Simple Sous Vide Action Plan
Getting started with sous vide doesn’t require a big investment or a steep learning curve. Here’s a practical sequence for your first two weeks that builds from a single successful cook into a technique you’ll use regularly.
- Day 1 — Get the equipment: Order an immersion circulator in the $70–$150 range from a reputable cooking brand. Check your kitchen for a pot at least 6 inches deep. Pick up a box of heavy-duty freezer bags if you don’t already have them. That’s everything you need.
- Day 3 — Your first cook: Start with a thick-cut ribeye or New York strip at 130°F for 90 minutes. Finish with a 60-second sear per side in the hottest cast-iron pan you can manage, with a knob of butter and a sprig of thyme. Taste the result against how you usually cook steak. The difference is the point.
- Day 7 — Expand the repertoire: Cook a chicken breast at 145°F for 90 minutes and a batch of soft-boiled eggs at 167°F for 13 minutes. Both demonstrate the method’s range in entirely different directions — one forgiving a protein that’s easy to ruin, the other hitting a window that’s nearly impossible to reach any other way.
- Week 2 — Build your reference: Try a tough cut. A bone-in short rib or chuck steak at 135°F for 36–48 hours will change how you think about inexpensive cuts. While it cooks, you don’t need to do anything at all.
- Ongoing — Calibrate to your taste: After four or five cooks, you’ll have personal temperature preferences that differ slightly from any published guide. Write them down. That’s your sous vide cheat sheet, built from your actual palate — more useful than any chart.
The sous vide method rewards exactly the kind of curiosity that leads someone to read a guide like this one. Set the temperature, seal the bag, step away. The technique does the work. All you provide is good ingredients and a hot pan at the end — and the results genuinely speak for themselves.